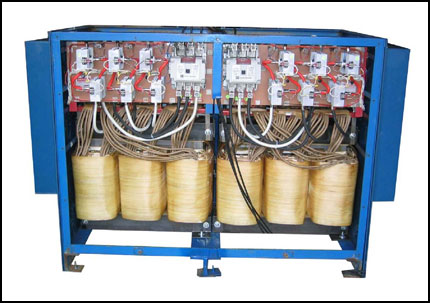
Repairing a Delta DC rectifier involves troubleshooting and fixing issues with the rectifier system. The rectifier is a crucial component in converting AC (alternating current) power to DC (direct current) power. If you encounter problems with a Delta DC rectifier, here are some steps to consider for repair:
-
Safety First: Before attempting any repairs, ensure the rectifier is safely disconnected from the power source, and all safety precautions are followed.
-
Visual Inspection: Examine the rectifier for any visible damage, loose connections, or burnt components. Look for damaged wires, fuses, or capacitors. Make sure there are no loose connections.
-
Check Input Power: Ensure that the AC input power source is providing the correct voltage and is free from any power fluctuations or anomalies. Test the input power to confirm it is within the rectifier’s specified input voltage range.
-
Check Output Voltage: Measure the DC output voltage using a multimeter. Ensure it matches the specified output voltage. If the voltage is incorrect or unstable, this may indicate an issue with the rectifier’s components.
-
Inspect Diodes and Capacitors: Diodes and capacitors are key components in a rectifier. Test them for functionality and replace any faulty ones. Diodes can be tested using a multimeter.
-
Inspect Cooling System: Delta DC rectifiers often have cooling fans or heat sinks to dissipate heat. Ensure these components are functioning properly. Overheating can lead to damage.
-
Examine Control Circuitry: Check the control circuitry for any loose connections or damaged components. This includes control boards, microcontrollers, and any interface components.
-
Replace Faulty Components: If you identify any faulty components during your inspection, replace them with the appropriate replacements. Make sure to use components with the same specifications as the originals.
-
Tighten Connections: Ensure all electrical connections are properly tightened. Loose connections can lead to inefficiencies and potentially cause damage.
-
Perform a Load Test: After repairing and reassembling the rectifier, conduct a load test to verify that it functions correctly under the expected load conditions.
-
Run Diagnostic Tests: Many Delta rectifiers have built-in diagnostic capabilities. Run diagnostic tests to identify any system issues. Refer to the user manual or manufacturer’s guidelines for specific testing procedures.
-
Safety and Compliance Checks: Before returning the rectifier to service, conduct safety checks and ensure that it complies with all relevant safety standards and regulations.
-
Record Keeping: Keep detailed records of the repair process, including a list of replaced components, test results, and any adjustments made. This documentation can be helpful for future maintenance.
If you are not experienced with electrical systems, it’s recommended to seek the assistance of a qualified technician or electrician for the repair of a Delta DC rectifier. Additionally, follow the manufacturer’s guidelines and consult the user manual for your specific rectifier model to ensure that you follow the correct procedures for repair and maintenance.

