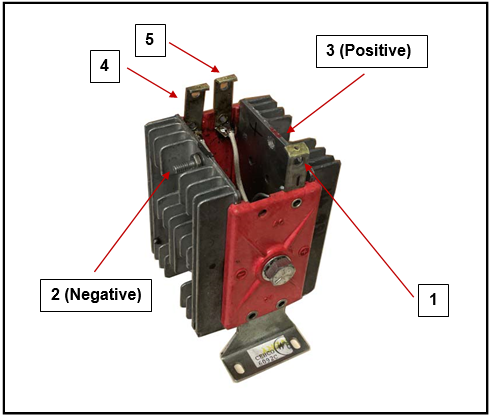
Rectifier repair involves diagnosing and fixing issues with a rectifier, which is an electrical device used to convert alternating current (AC) to direct current (DC). Rectifiers are commonly used in various applications, including power supplies, battery chargers, motor drives, and more. Repairing a rectifier may be necessary if it malfunctions, exhibits performance problems, or experiences component failures. Here are the general steps involved in rectifier repair:
-
Identify the Problem:
- Begin by identifying the specific issue with the rectifier. Common problems include voltage irregularities, overheating, excessive noise or vibration, and complete failure.
-
Safety Precautions:
- Before attempting any repair work, ensure the rectifier is disconnected from the power source to prevent electrical shock or injury.
- Wear appropriate personal protective equipment (PPE), such as safety gloves and eye protection, when working on the rectifier.
-
Visual Inspection:
- Examine the rectifier for visible signs of damage, such as burnt components, loose connections, or damaged wires. Look for signs of overheating, like discoloration or scorch marks.
-
Testing and Measurements:
- Use a multimeter or other test equipment to measure the input and output voltages, current, and resistance.
- Check for continuity in the input and output circuits.
- Verify that the rectifier’s components (e.g., diodes, capacitors, transformers) are functioning correctly by conducting tests as per the manufacturer’s specifications.
-
Component Replacement:
- If a specific component is identified as faulty (e.g., diode, capacitor, voltage regulator), replace it with a new component of the same type and rating.
- Be sure to follow proper soldering and desoldering techniques when replacing components.
- Pay attention to the manufacturer’s guidelines for component replacement and any specific tolerances or specifications.
-
Cleaning and Maintenance:
- Remove dust, debris, or contaminants that may have accumulated on or inside the rectifier. Clean the rectifier’s cooling system (e.g., fans or heat sinks) to ensure proper heat dissipation.
- Tighten any loose connections and fasteners.
-
Reassembly:
- Reassemble the rectifier carefully, ensuring that all components are in their correct positions and orientations.
- Replace any damaged or worn insulation or protective covers.
-
Testing and Calibration:
- Reconnect the rectifier to a power source and test it under controlled conditions.
- Measure the output voltage and current to ensure they are within the specified range.
- Verify that the repaired rectifier operates without overheating or exhibiting any unusual behavior.
- Make any necessary adjustments or calibrations to ensure the rectifier’s proper operation.
-
Documentation:
- Maintain records of the repair work performed, including a list of replaced components, measurements, and any adjustments made.
- This documentation can be valuable for future maintenance and troubleshooting.
-
Final Inspection:
- Perform a final visual inspection to confirm that the repaired rectifier is free from defects and meets safety and performance standards.
Rectifier repair requires technical expertise, and it is essential to follow safety guidelines and manufacturer recommendations throughout the process. In some cases, especially with complex or high-power rectifiers, repairs may be best performed by experienced technicians or professionals with specialized equipment and tools.

